
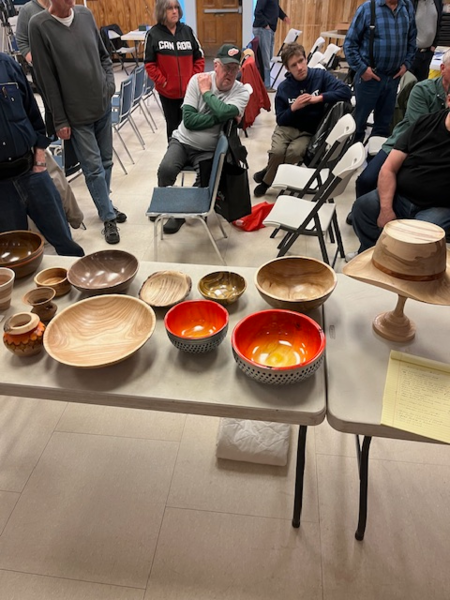
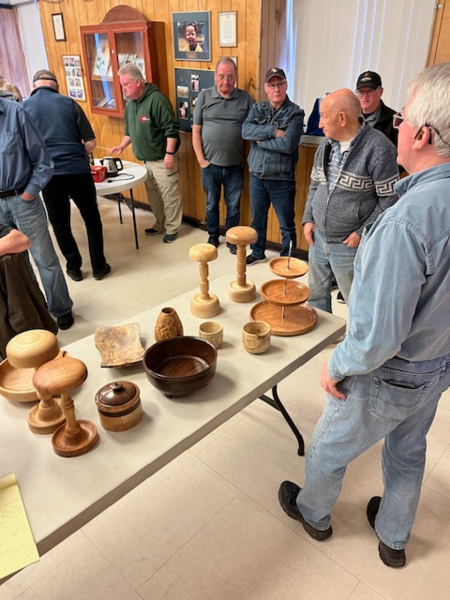
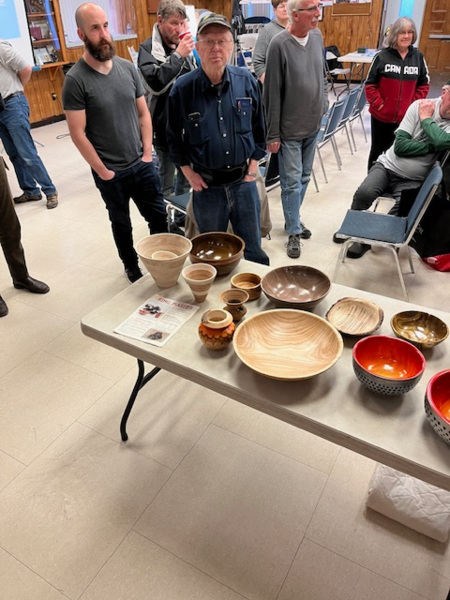
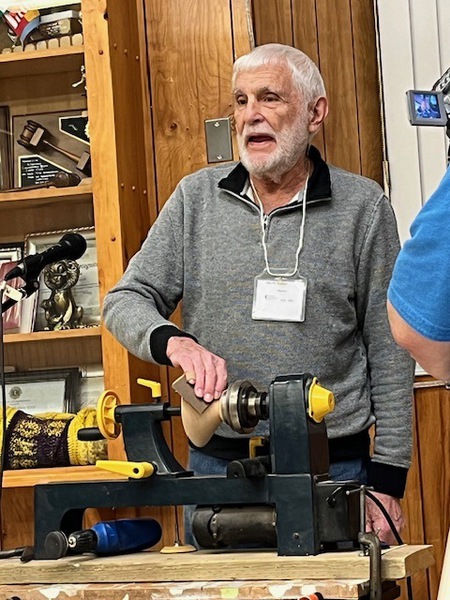
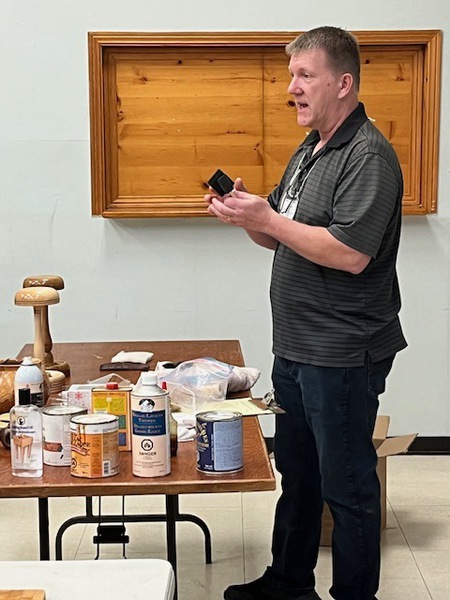
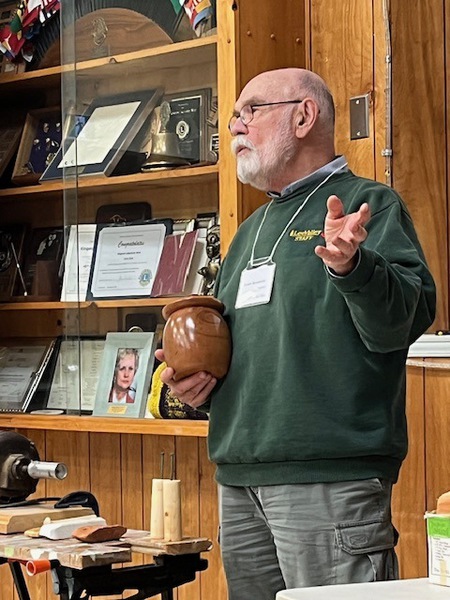
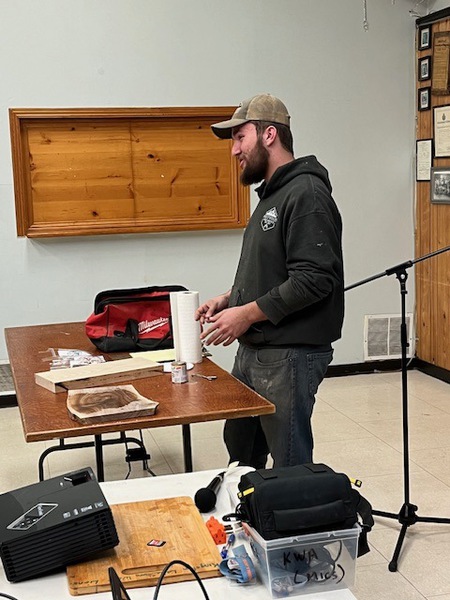
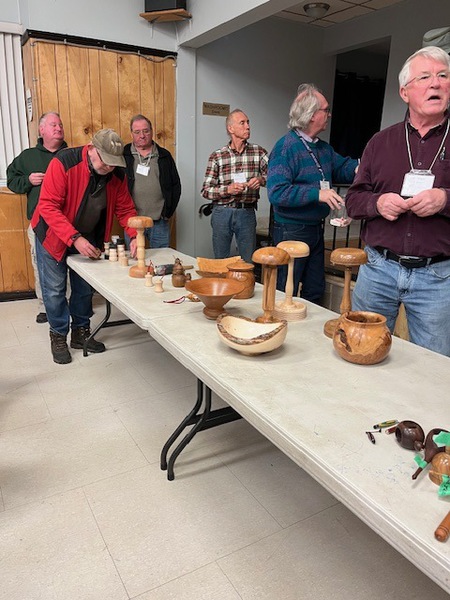
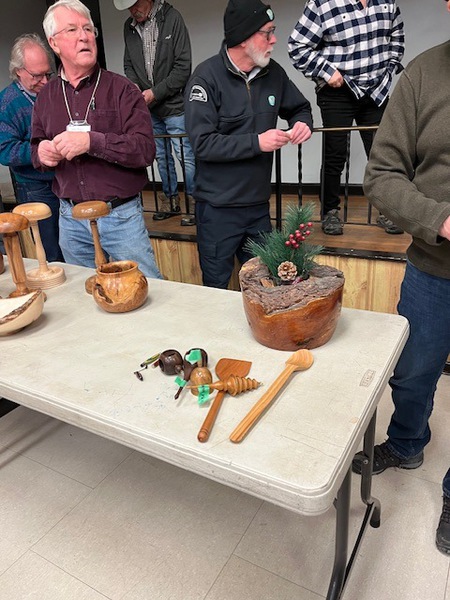
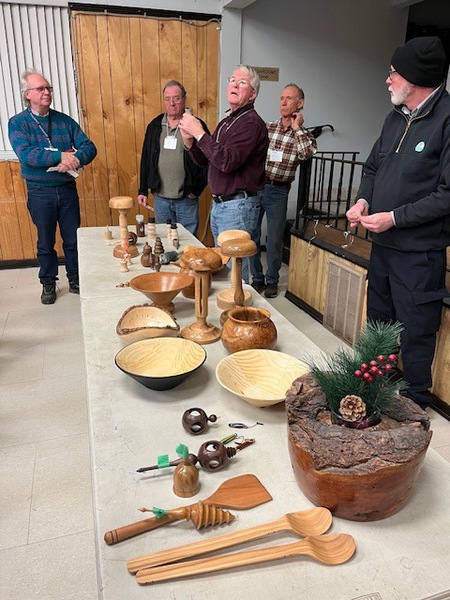
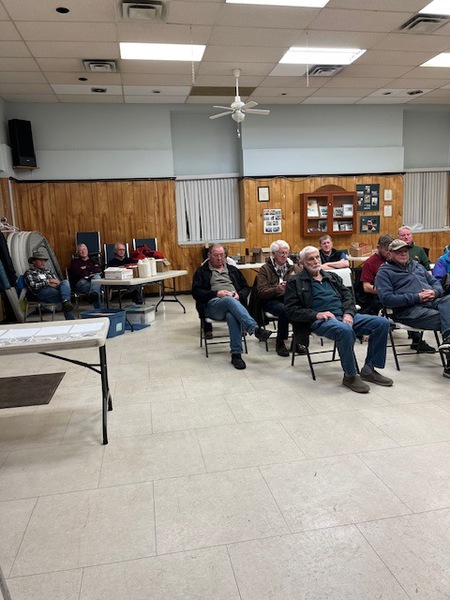
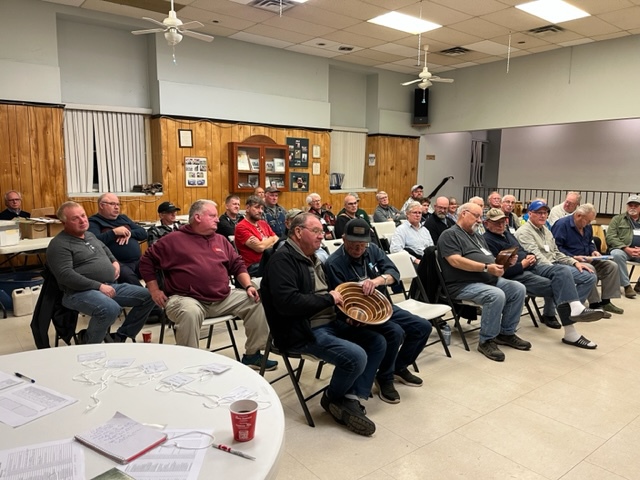
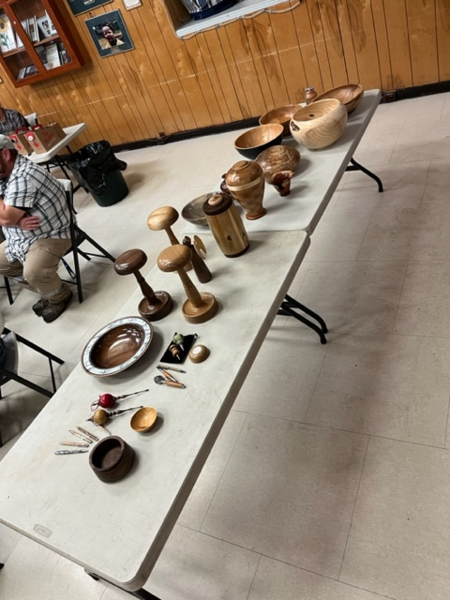
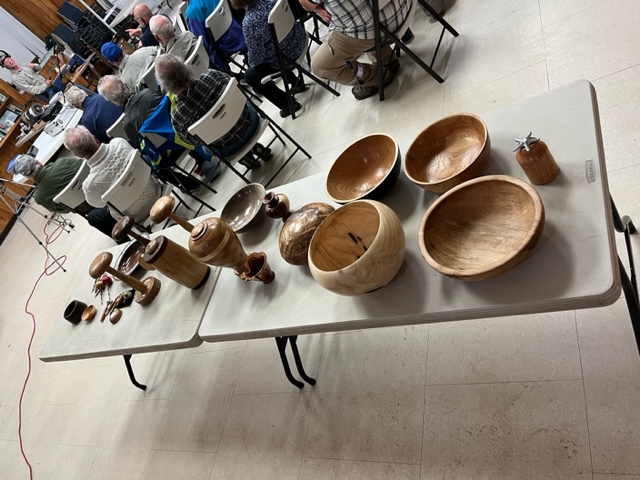
Show and tell from May 2024 meeting


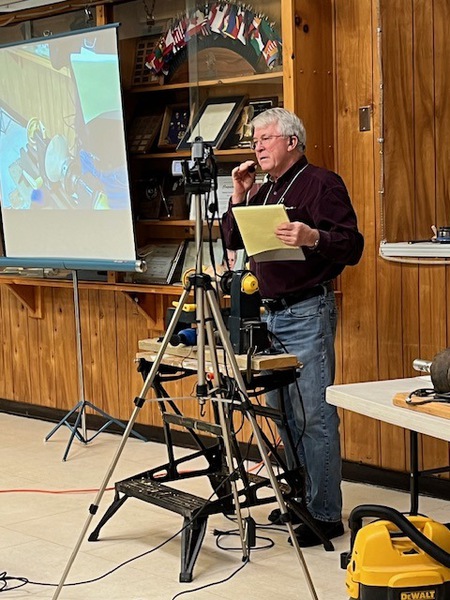
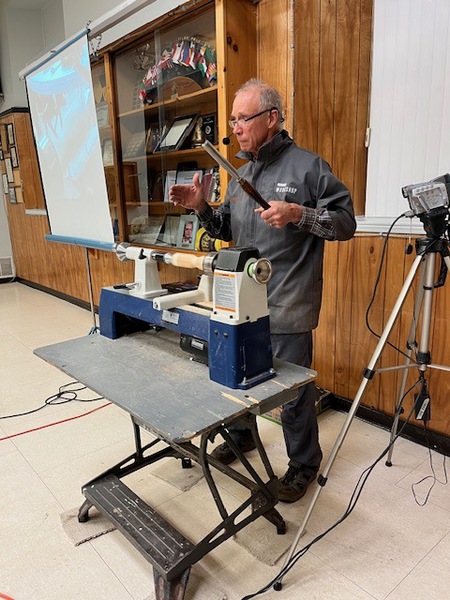
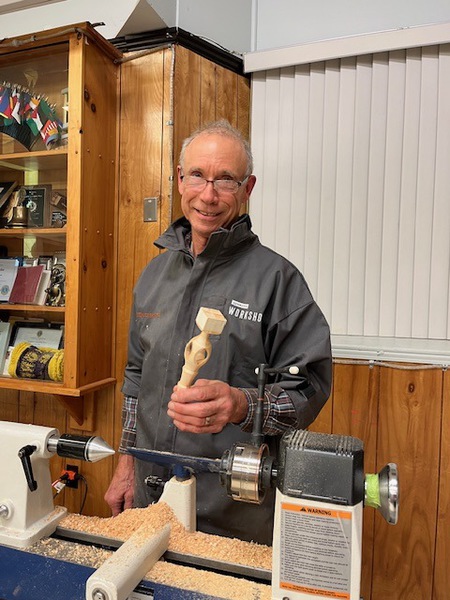
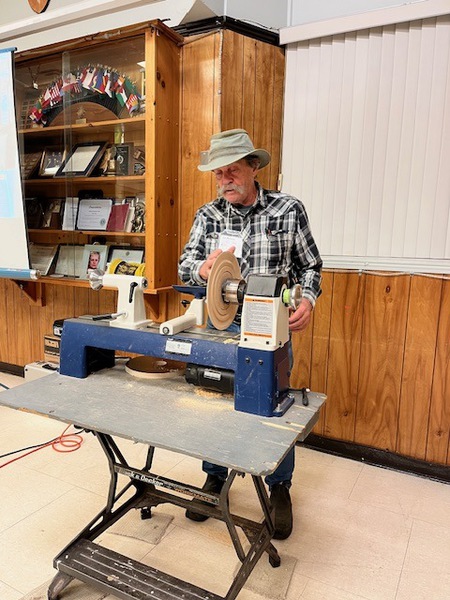
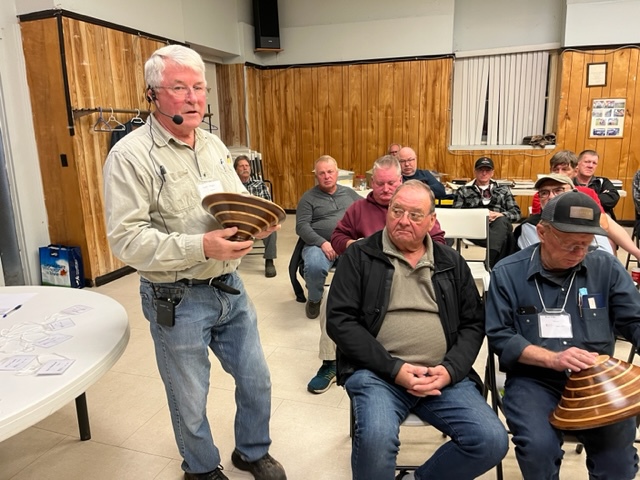
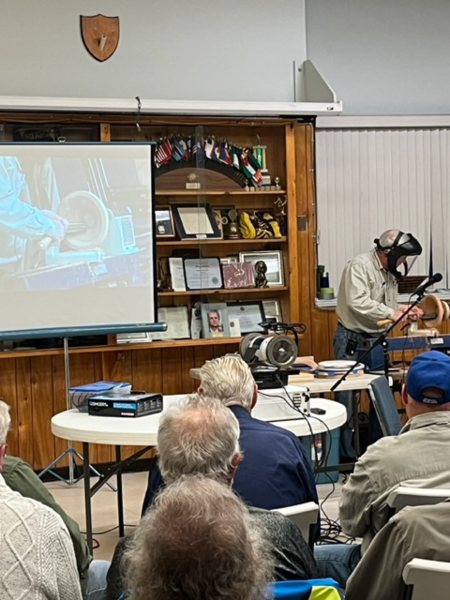
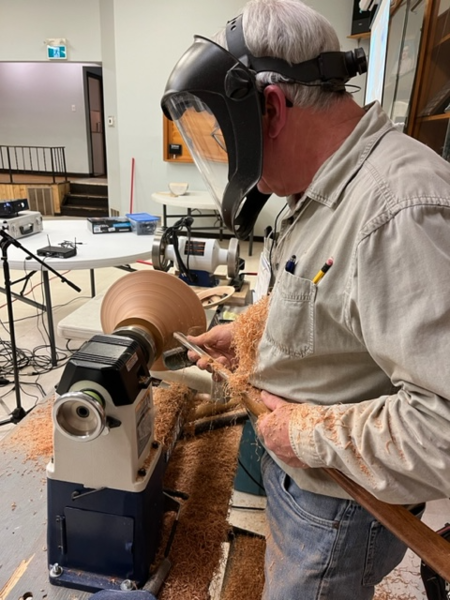
Dan at the lathe


Feel free to download these for your useage.

Here are the steps to make the multi axis vase that we did on saturday at the Frank Didomizio demo.
Here is a youtube link showing a very basic turning of a vase. https://youtu.be/nnNYUFuTyvE
Microsoft Word document [36.6 KB]
Pictures from April 2024 meeting , click to enlarge


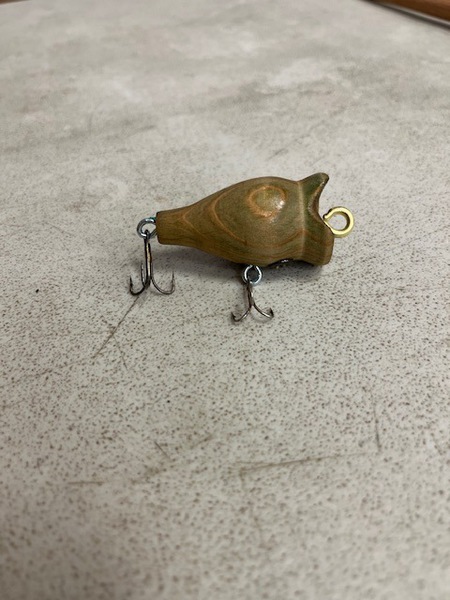
Turned bird Instructions:
Woodturning a Bird from Richard Dlugo, 2018, AAW, steps simplified.
1. Mount square body and head blank on lathe.
2. Turn body. Cut tail on band saw. Create flats on the sides of the body for wings.
3. Drill ¼ inch hole in body for neck and 1/8 inch for legs.
4. Part the body from head blank. Sand.
5. Turn head slightly smaller diameter than body, fairly round with beak.
6. Drill hole for eyes and neck. Contrasting dowel or Pencil crayons work well.
7. Fasten head to body with neck dowel and attach legs. Leg and neck length can vary.
8. Mount and turn rectangular wing blank on lathe. Caution with depth.
9. Cut wings from blank, sand edges and glue to body. Position can vary but should be equal.
10. Head position can be rotated and glued or not. Legs can be bent in different positions. Apply preferred finish or paint.
** you can copy and paste these to your word processer and print from there. **
Pictures from the Dec Meeting. Click on an image to enlarge it.
Microsoft Word document [31.0 KB]
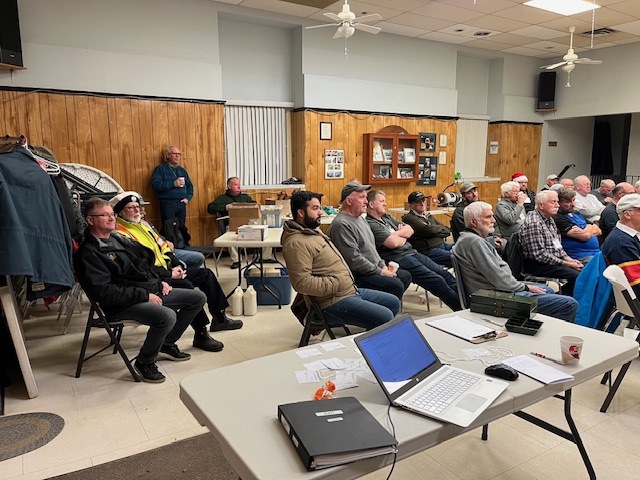
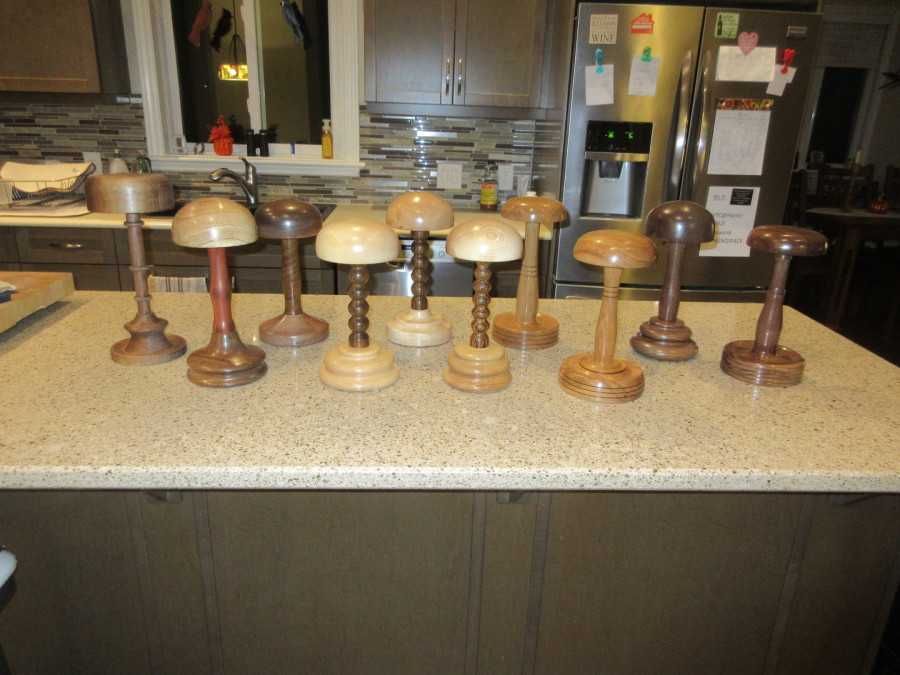
Pictures from Novembers meeting. Click on an image to enlarge it.

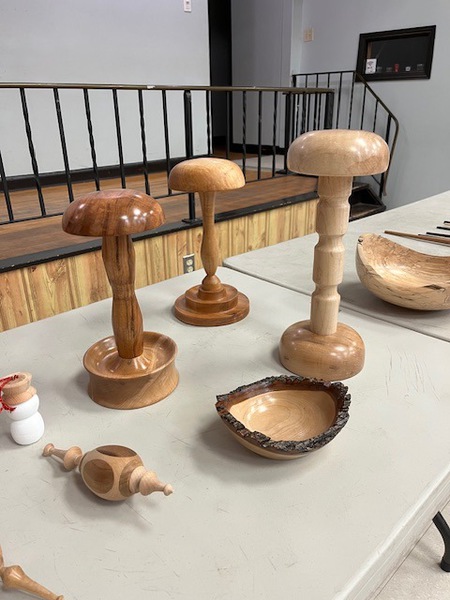

This is a picture of the wig stands we delivered to KHSC today.
October KWT Meeting Photos
Click on an image to enlarge.


October 16, 2023
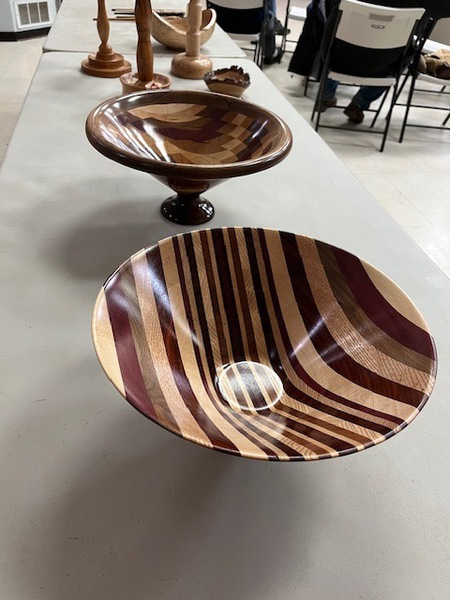
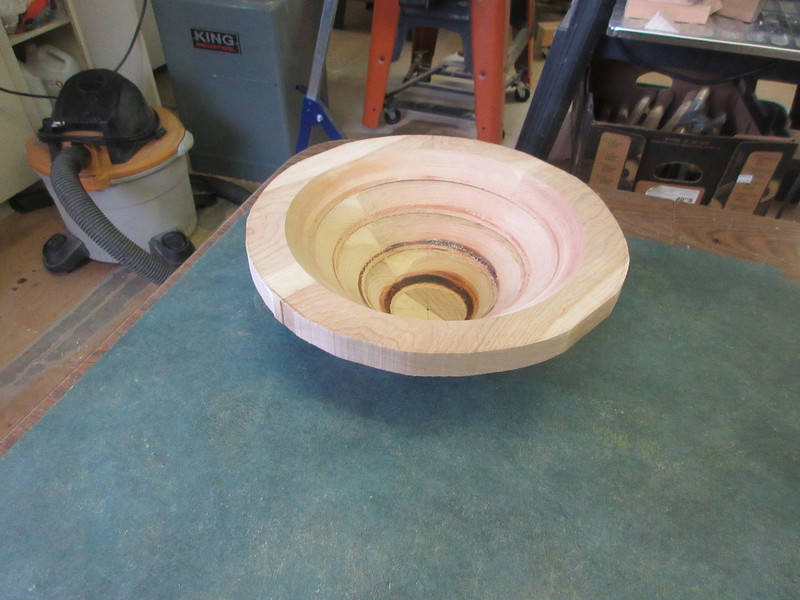
MAKING A BOWL FROM A BOARD
Using 1x6 dressed lumber, cut 2 pieces 12 inches long (this should give you 2 pieces ¾ of an inch x 5 ½ inches.
Plane or sand both sides to the same thickness
Joint 1 edge on each board (for 2 boards)
Glue together and clamp
Let dry and clean up the glue joint
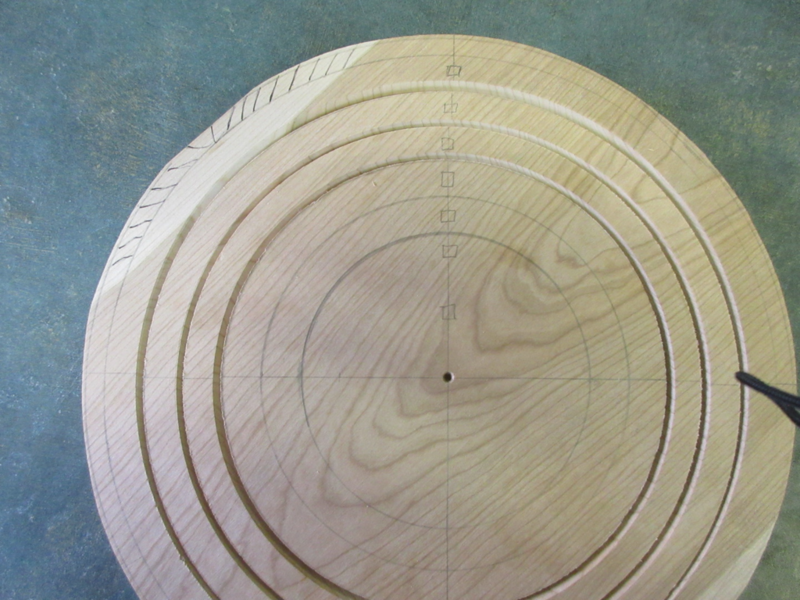
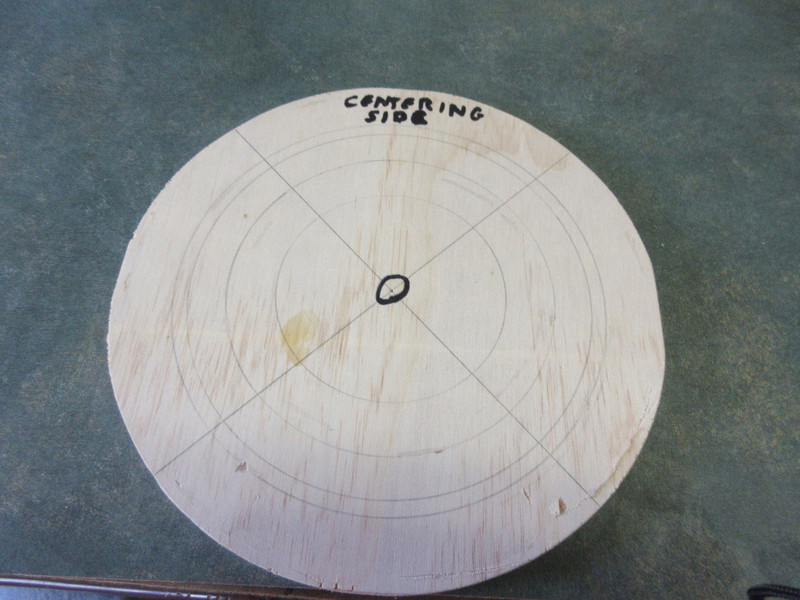
Find the center, there are 2 ways to mark the rings out
- Start at the largest ring you can make on your board
The next ring in will be the same distance in as the thickness of your board
Continue until you get to your base size
Note: the base should be minimum 1/3 the size of your largest ring
Don’t forget how small the bottom will be because of the 45 degree cut you will be making
- Start at the base (the center) with your first ring
Make successive rings the same as in the first method
When you get to the last ring see if you have extra wood left on the outside of the last ring
This can be used to make a bit of a “flare rim”
(See picture 606)
Now you are ready to cut your rings. Mount a waste block in your chuck. Clean the face of the waste block.
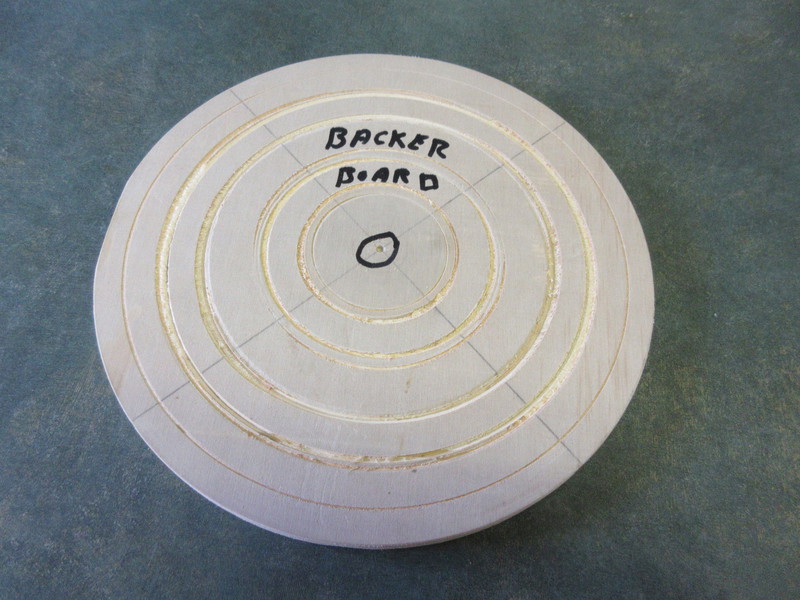
Cut a backer / centering sheet a bit larger than the largest ring you marked our on your board. Should be ½ inch thick minimum. Square the backer sheet and find center on both sides. You will use both sides.
(See pictures 611 & 612)
Cut this to a circle
One side will support the wood while cutting your rings
The other side will center your rings for gluing to each other
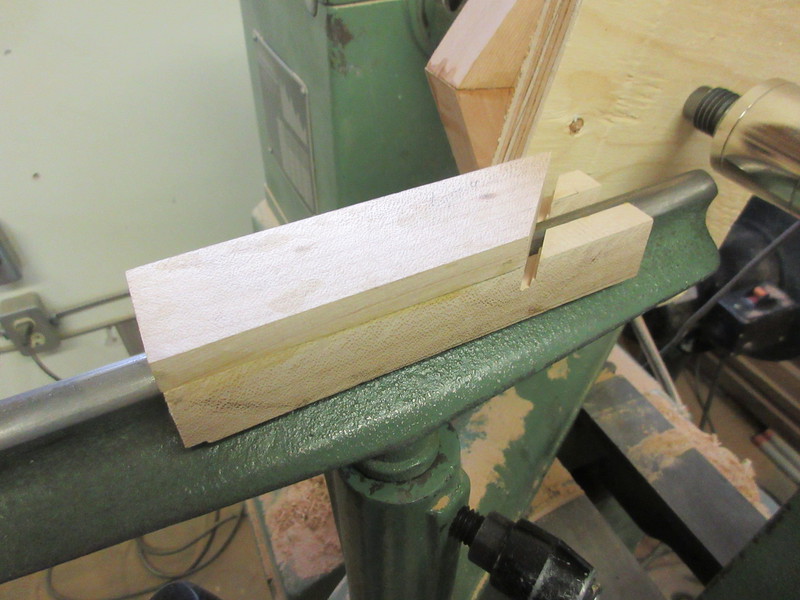
Jamb fit this to the waste block using the tail stock and live center
Use hot melt glue to hold the backer board to the waste block
Cut the corners off your board now, you can save the cuts for a base is you want to save wood
Slide the tail stock back and jamb fit your board to the backer board using the tail stock and live center
Set your tool rest parallel to the work piece
Mark 45 degrees on the tool rest or use another method to get a 45 degree angle to follow
(you can make a jig for the tool rest)
(See pictures 613 & 614)
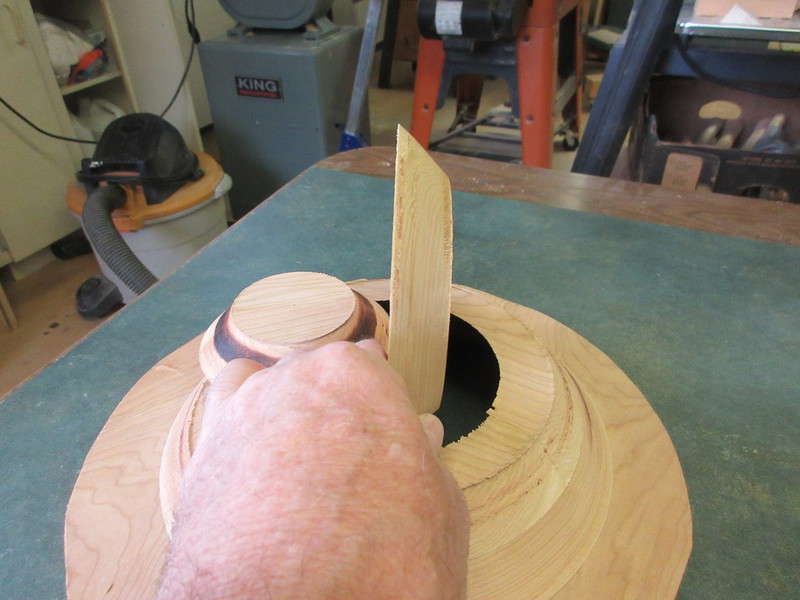
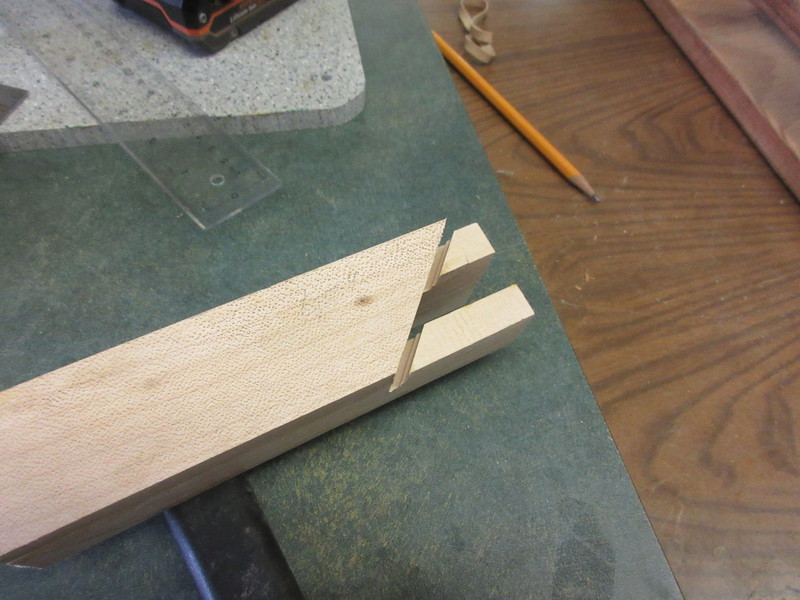
You are now ready to cut the rings
With a parting tool, cut the outside ring following the 45 degree angle
This ring will be “Captured” from coming off the rest of the work piece
Tape this ring to the backer board to hold while cutting the next ring
This just keeps it from flopping around
Continue until all rings are cut
(See pictures 607 & 609)
You will need to sharpen quite often
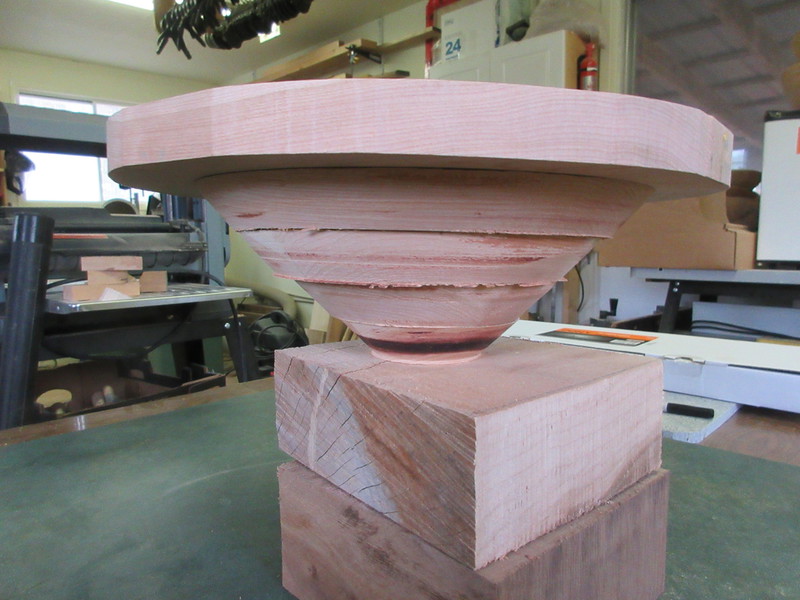
When all rings are cut, remove them from the lathe
Now stack them in reverse to see what your board has turned into
(See pictures 608 & 610)
If the bottom of the bowl is too small you made decide to add another piece to the base, this will allow you to make a larger “foot” for better support or to lift your bowl
(This is where you can use the corner cut offs if you wish to save wood) Or cut a solid piece
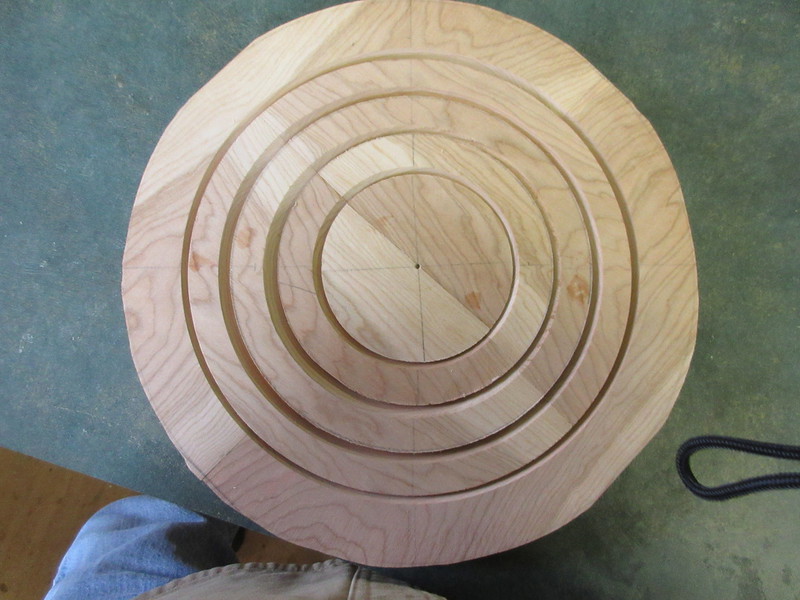
Remove the backer board from the waste block and turn over
Now mark rings on this side slightly larger than the largest diameter of each ring you just cut
(See pictures 611 & 612)
Sand all faces to 80 grit before gluing
If you are using the extra “foot” piece glue it to the waste block at this time
Glue your smallest ( base piece ) to the waste / foot piece using the tail stock and live center to center and hold
Position the smallest ring on the centering board as close to evenly spaced with the ring on the board
Note: you will be placing the ring on the centering board with the larger diameter against the centering board
Apply hot melt glue to hold in place
Apply a thin even layer of glue to both (base and smallest side of the ring on the centering board)
Using the tail stock and live center press and hold the centering board to the base using the center hole on the backer side of the board
Let the glue set up for approximate 15 minutes
Use a scraper or chisel to gently remove the hot melt glue and centering board from the first ring
Repeat until all rings are glued up
Remember to sand each face to 80 grit before gluing
Let sit overnight
The next day you can turn your bowl from a board
GOOD LUCK AND HAVE FUN
Put your mouse pointer over the picturre to show the matching number from the text
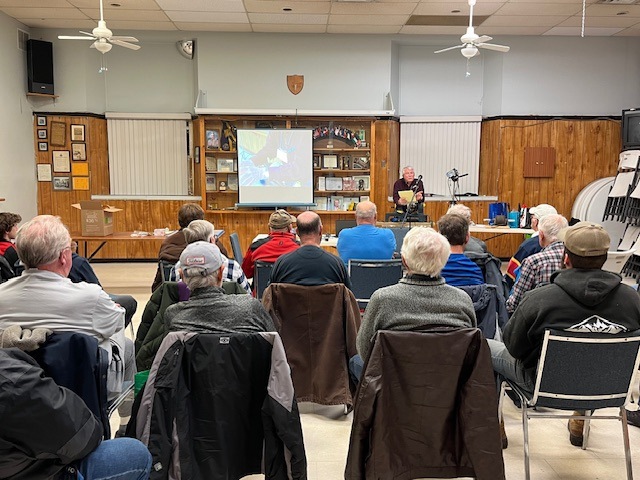
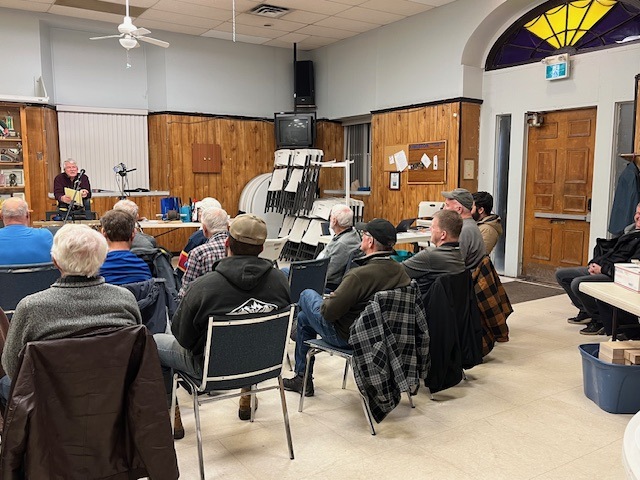
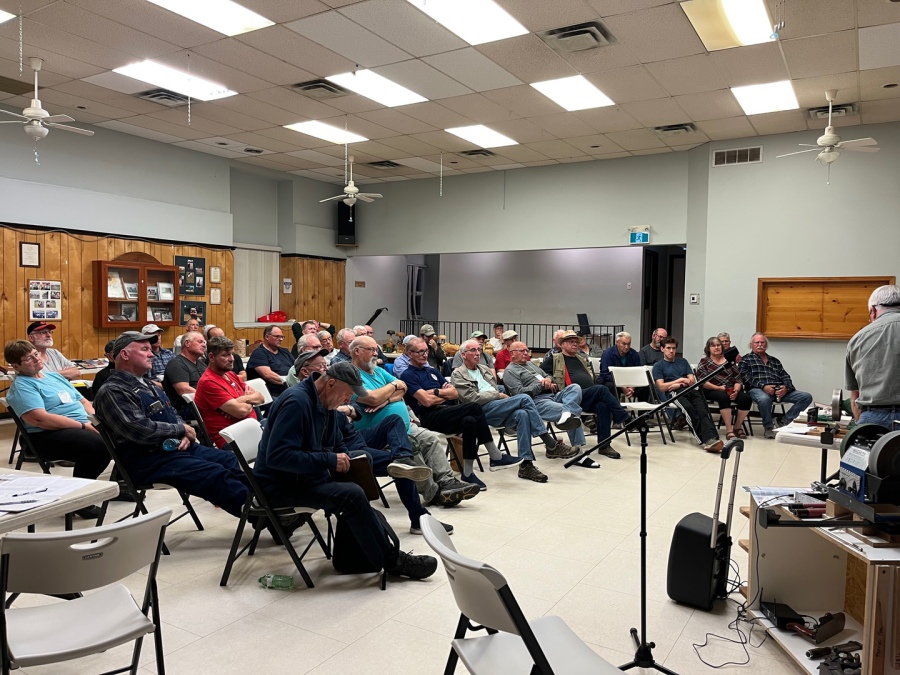
Pictures from the September 19 2023 meeting
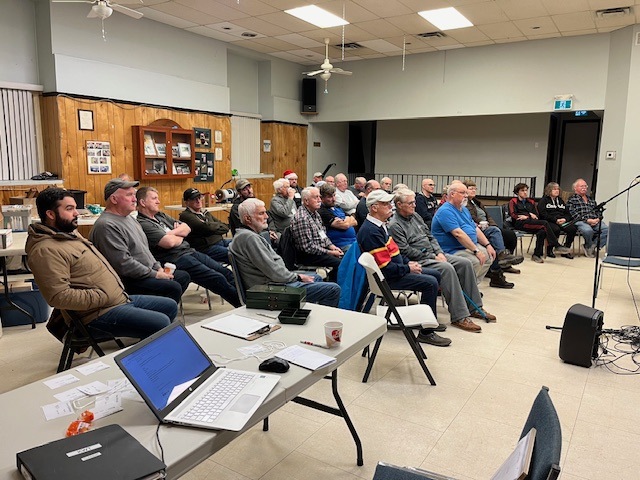
43 Members Attended
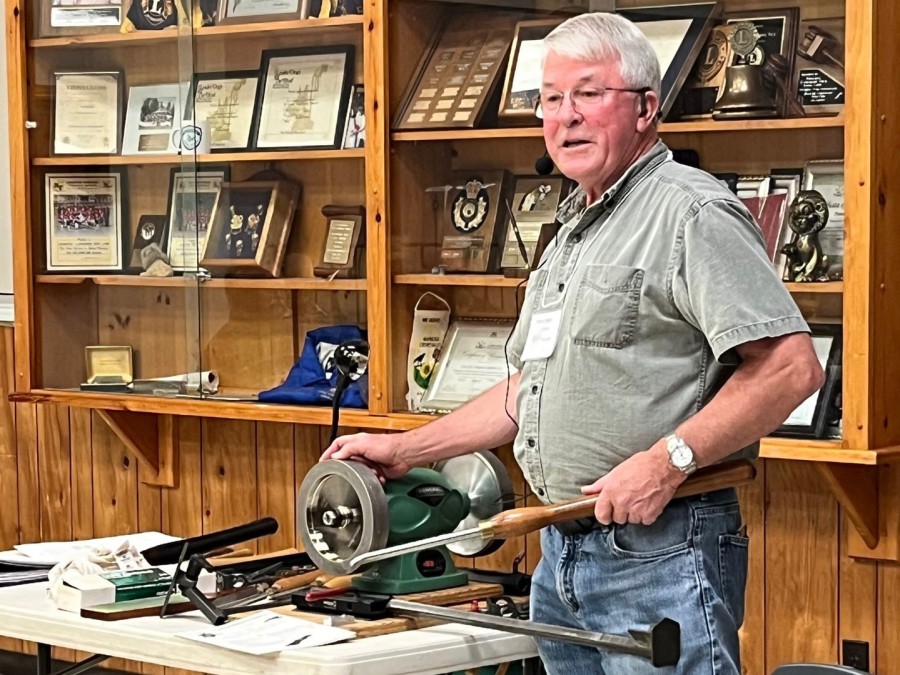
Sharpening with CBN Demo with Larry
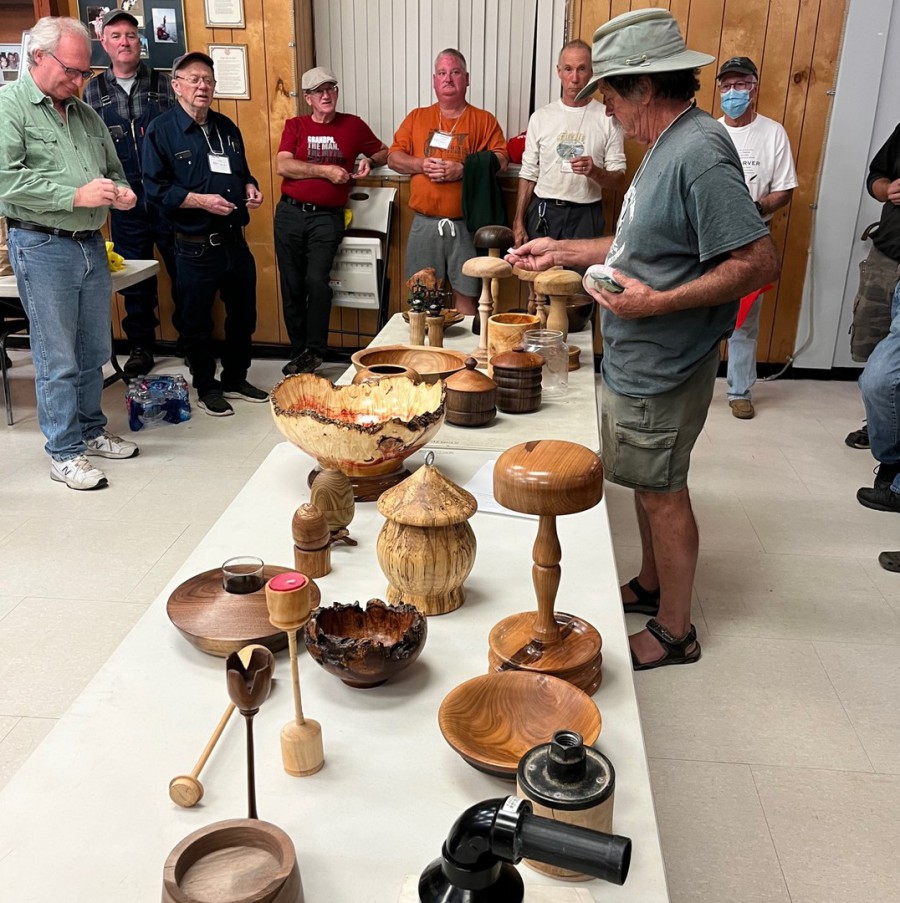
Show & Tell Pieces
Sharpening Tools
Lance Besharah has provided us with some information we can download and keep. Feel free to download and print these for your use.
Microsoft Word document [18.8 KB]
Adobe Acrobat document [29.8 KB]
Turn a Mouse
1. Cut blanks 1½ “ - 1¾ “ square and about 3” long
2. Drill 5/32” dia hole in centre of one end about ⅝” deep
3. With centre point of live tail centre in this hole grip other end in spigot chuck jaws ⅜ - ½”
4. Turn to cylinder, (spindle gouge, roughing gouge or skew)
5. Turn hemisphere on tail end (spindle gouge or skew)
6. Taper head end towards chuck to make egg shape until ½”dia. remaining
7. Decide on top side (back of mouse). Lock index wheel to draw centreline on top surface
using toolrest to guide pencil
8. Lock index wheel at 30⁰ from centreline (4 div on 48-hole index wheel or 2 div on 24-hole)
Draw line diverging 30⁰ from centreline.
9. Repeat at 30⁰ the other side of the centreline.
10. Mark points at ⅞” from snout on 30⁰ lines for ear holes and at ½” for eye position
11. Make indents at all four points with bradawl. Mark eye points with black marker
12. Lock spindle on one of the 30⁰ lines and, resting drill on toolrest, drill 5/32” hole
perpendicular to surface ½” deep for ear hole.
13. Repeat on other 30⁰ line.
14. Back off tailstock and round off tail end
15. Sand if necessary (If you use a skew it probably won’t be!)
16. Taper down snout to part off
17. Make flat on bottom with disc or belt sander at appropriate angle for mouse to stand.
18. Use black marker to draw eyes and place single drop of thick c/a glue on each eye. Allow
to dry naturally.
19. Fit ears and tail in appropriate holes. Draw mouth etc.
20. Tail can be cut from leather bootlace. Cut on angle to give tapered tail.
21. Ears can be cut from thin chamois leather. (½” dia circle with ¼” wide tab that can be
folded over and glued into ear hole.
Keith R. Notley 14.Nov.2018
December 13 2017 Demo notes ; Turning Hollow Spheres
John Williams has posted some excellant pictures on the club facebook page.
Turning Hollow Spheres
OBJECTIVE: Make a hollow wooden ball with no visible clue to how it was hollowed.
Select a straight-grained block of wood larger than the proposed sphere size. You may want to practice splitting a few logs of different woods to find one that splits cleanly with little or no
splintering. (Use axe head or heavy knife blade and hammer). I have found Beech and Manitoba Maple to have good splitting properties.
Black walnut splits cleanly but tends to splinter a bit. I have found that wood splits more cleanly parallel to the growth rings. Radial splits tend to yield more splinters.
The block should be long enough in the long grain direction that you can eliminate the bruised area where the axe enters. Don’t try to trim the block too closely to shape before splitting as the
split may be unpredictable.
The split block can be held together and trimmed to size with the split plane across the centre. The first turning operation is done between centres with the split plane perpendicular to the lathe
axis, so when trimming your block, leave a little extra material on the ends parallel to the split plane so that the depressions made by the lathe centre points will be eliminated from the finished
sphere. To do this, use a band saw to make a cut parallel to the split plane and (D/2 + ¼”) where D is the diameter of your ball, on each side of the split plane. (In practice, the split will
probably not be a perfect plane, so you have to use your judgment a bit here.)
You can now draw a circle with a radius of (D/2 + 1/16”) on one of the surfaces you have just cut and, holding the two pieces of wood together, roughly trim out a cylinder by cutting outside the
circle.
Mount the rough cylinder between centres on the lathe and turn to a true cylinder. Draw a pencil line round centre of cylinder as close as possible to the split plane. Draw another line (D/2 + 1/16”)
on each side of the centre line and cut the ends down to a small stub at this line. Cut a tenon on each end to suit your 4-jaw chuck.
Remove from lathe, separate the pieces and check the split surfaces for loose splinters near the periphery. You want to fix these with thin c/a glue before hollowing as if you lose a splinter here
you will end up with a hole in your ball.
Remove drive centre and attach your 4-jaw chuck. Grip one half of cylinder with the tenon and turn a hemispherical depression. Use a bowl gouge as this operation is like turning the inside of a small
bowl. This needs to be turned accurately for a uniform wall thickness in the finished ball. Cut out a semicircular card template ½” less than the OD of the ball for a ¼” wall thickness, (or larger if
you feel brave!) and use this to fine tune your excavation. Pay attention also to the depth relative to your pencilled centre line as this may not coincide with the rim all the way round. Repeat on
the other half of the blank.
You are now ready to glue the two halves together. I prefer to use a wood glue for this rather than c/a as it gives you a bit more time to adjust the fit, makes a stronger bond and a less visible
glue line.
It is a good idea to insert a penny or some other small object inside before gluing the two halves together. This will add a bit of “How did he do that?” mysticism to the finished product, as some
people may not realize that the ball is hollow. Inserting a 3/8” ball bearing will enable you to perform magic tricks with the aid of a magnet set in the end of a ‘magic wand’.
Clamp and leave overnight to ensure a good bond.
Next, mount the glued-up blank between centres as before. Turn down the cylinder to a hair over the planned sphere diameter. Redraw the centre line and turn away the corners to a roughly spherical
shape. Use a cardboard cutout as a gauge but don’t try to get too close to the final sphere at this stage. It is important not to take off too much.
The remainder of the exercise is as for making a solid sphere. However there is one important difference.
When turning between cup centres with the split plane parallel to the lathe axis, there is a danger of cracking the glue bond if too much end pressure is applied. To minimise the end pressure it is
necessary to increase the friction between the cup chucks and the ball. This is achieved by lining the conical cups with 220 grit sandpaper.
Making Cup Chucks
Select a fine-grained stable (thoroughly dry) block of wood about 2” square and 4” long. Mount between centres and cut tenon on each end to suit your 4-jaw chuck. Turn central part to a cylinder
slightly larger than half your ball diameter leaving a shoulder at each end for chuck registration.
Mount one end in 4-jaw chuck and tighten securely. Drill hole in other end to accommodate the swivel end of your live tailstock. Make the fit as snug as you can. Drill undersize and fine tune with
small skew if necessary. Cut blank in half with parting tool. On piece still in chuck, turn conical depression in the end. Repeat on other piece.
Measure the distance from the apex of the cone to the rim ‘x’. Cut out a square of side slightly larger than 2x from a sheet of 220 grit sandpaper. Make a single radial cut to the centre of the
square. Press the sandpaper square into the conical depression allowing the cut edges to overlap. When well seated, mark where the overlap ends. Remove and cut out sector from mark to centre with
scissors. Use double sided tape or spray adhesive to stick sandpaper into depression. Trim off the excess sandpaper round the rim. Repeat on other chuck piece.
Turning Sphere
Attach your cup centres to the lathe and mount the ball with the marked centre line parallel with the lathe axis.
This is easy to say but needs to be done as accurately as possible. At this point you will find out how accurate your lathe centres are! Besides lining it up perfectly, make sure the opposite sides
of the centre line are the same distance from the tool rest when rotated through 180 degrees. This is very important.
Don’t apply too much pressure with the tailstock or you may pop your glue joint.
Remove the stubs with a small saw to lessen the chance of tearout.
When you turn the lathe on you will be able to see a ‘ghost’ formed by the material protruding outside the sphere defined by the periphery of the initial cylinder. The next step is to remove this
excess material. I find that the best way to true up the sphere is to use a sharp skew as a scraper. Stop the lathe periodically to check on your progress. You will see your freshly scraped surface
gradually getting closer to your centre line. At this point you will find out how well you lined up your ball when you mounted it between the cup centres. The idea is to stop scraping just before you
remove the centre line. (If the line disappears on one side before the other your ball will not have a uniform wall thickness.) Draw another centreline round your sphere which
should intersect the first one at 90 degrees.
Rotate the ball through 90 degrees once more so that both centrelines are now in line with the lathe axis and check carefully to ensure that all 4 pencil lines are the same distance from the tool
rest. Adjust if necessary. Proceed to remove the remaining excess material which was previously in contact with the cup chucks. When satisfied that all lumps have been removed, the ball can be sanded
by rotating through the 3 axes for each grit.
When sanding finer than 220 grit, line the cup chucks with a bit of paper towel or foam to avoid marring your beautiful new surface.
Keith R. Notley
13.Dec.2017
Notes of KWT Club Meeting of December 13, 2017 held at Frontenac High School.
Discussion:
· Nelson called the meeting to order at 1905 and welcomed new members.
· Elections for the Executive were discussed. The following members agreed to allow their names to stand for elections for the following positions:
o Walt Sepic Treasurer
o Dave Lindensmith Secretary
o Keith Notley Vice President
Nelson confirmed that he would be stepping down as president.
Nelson requested nominations for all 4 positions. No nominations were made.
Elections will be held in January.
· Lance Besharah has donated an air filtration system to the club as a fundraiser. Many thanks to Lance for his generous donation to the club. The filtration system will be raffled once 40 tickets have been sold. Tickets are being sold for $10 and are available from Dan Sabourin. As of the end of the meeting, 13 tickets had been sold.
· MWM Winterlight was held December 2, 2017. KWT demo was well attended throughout the day. Approximately 60 turned ornaments were provided by KWT members for kids to decorate. These were pretty much gone by 1030. Much goodwill and good PR for the Club.
· Keith Notley provided a demo on turning hollow spheres. Refer to the handout that Keith provided at the meeting (attached to the notes of meeting.)
o The wood used must be dry, or the finished product won’t be a sphere for very long
o The blank must be split with an axe, resulting in bruising, so the blank has to be significantly larger than the finished sphere will be
o Woods differ in how cleanly they split: elm doesn’t typically split cleanly, while black walnut splits well.
o Wood splits better if split tangentially to the growth ring rather than at right angles to the growth ring)
o The split plane will be the center of the bowl
o Once split, the 2 blanks are pressed together and the blank pair is cut in to a rough cylinder on the band saw
o The first turning is between centers, with both halves of the blank pressed together, with the split face perpendicular to the lathe bed
o The rough cylinder is trued to round
o Check the diameter frequently with calipers; the cylinder diameter should be slightly larger than the desired finished diameter of the sphere (eg 3⅛” for a 3” sphere)
o A skew or gouge can be used
o Mark the split plane (equator) of the sphere with a pencil
o Part in at each end of the blank to create a stub at each end. Distance between stubs is slightly larger than the finished diameter. The stubs define the diameter of the sphere in the direction parallel to the lathe bed, just as turning the cylinder defined the diameter in the direction perpendicular to the ways
o Create a tenon at each end of the blank pair to suit your scroll chuck
o Now it’s time to turn 2 hemispherical bowls, which will be glued together to form the sphere
o Mount one of the blanks on a scroll chuck and hollow: the inside profile is done prior to the outside
o The shape is checked frequently, using a hemispherical cardboard or hardboard template
o A wall thickness of ¼” is reasonable, given the requirement to provide a surface for gluing
o A depth gauge is also used (in this case set at 1 9/16” for a 3” outside diameter sphere)
o The interior can be finished with an asymmetric radiused scraper
o Good news: the interior does not need to be sanded J
o However, the wall thickness does need to be uniform (and the same for both halves) or the sphere will roll eccentrically (and yes, some clown will inevitably roll your sphere)
o Once both halves are hollowed, they are glued together with wood glue (not CA)
o When mounting between centers, washers can be used to effectively shorten the length of the point
o When creating the exterior profile, work from small diameter to large diameter (ie the piece is oriented as a cross grain turning, not a spindle turning)
o Turn the piece to an approximate sphere shape
o A skew chisel can be used in scraping mode to refine the shape
o A semi-circle template is used to check the roundness of the exterior
o Once the exterior is round (except for the ends), remove the piece from the lathe.
o Shop made cup chucks are used to hold the piece for further turning
o Turn the piece 90o from the original orientation and place between cup centers.
o Sandpaper can be used in the cups (held with double sided tape) to improve the driving ability of the cup chucks. Grade 220 sandpaper works well. By using sandpaper, pressure can be reduced and the glue joint will be less likely to fail
o One cup chuck fits on the tailstock, while the other cup chuck can have a tenon so it can be held in a scroll chuck
o Once placed between cup centers, strike another equator line 90o to the first. The 2nd equator line must be 90o to the ways
o Set the tool rest parallel to the ways and measure the distance from one of the equator lines (ie 1st equator line) to the tool rest. Rotate and do the same for the other half of the 1st equator line. The distances from each measurement have to be the same for the piece to be centered. Adjust as necessary.
o Rotate the piece so that the 1st equator is parallel to the ways. Measure the height from the equator to the lathe bed on either side of the piece. The distances from each measurement have to be the same for the piece to be centered. Adjust as necessary.
o Turn away the butt end “ghosts” to round this part of the sphere.
o A skew chisel can be used in scraping mode, once the sphere is approaching round.
o Care must be taken during sanding, as the piece can be sanded out of round due in part to different abrasion rates for end grain and side grain
o Count off the same number of sandpaper strokes for each sanding position
o Sand lightly and keep the sandpaper moving
o The grain ”bulls eye” can be used for a reference when reorienting the piece during sanding
o Sand with piece mounted in each of the 3 axes (x, y, z)
· Items brought in for Show and Tell and Challenge included:
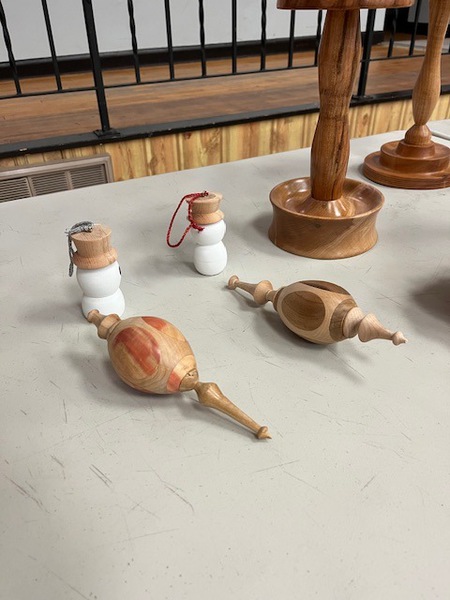
o Snowmen and Angels of differing styles and level of detail were brought in by many different members
o Inside-out Christmas ornaments of maple, poplar, butternut, finished with wipe on polyurethane
o Christmas ornaments with a display stand with a shape similar to an inverted bowl and bent brass rod
o Christmas ball with finial made from cherry
o Birdhouse ornaments
o Christmas Trees made from scrap wood and painted
o Sea Urchin ornaments (urchins filled with spray foam to improve strength)
o Yarn bowl with bottom insert sanded to 400 and finished with tung oil. Spiral cut with a coping saw
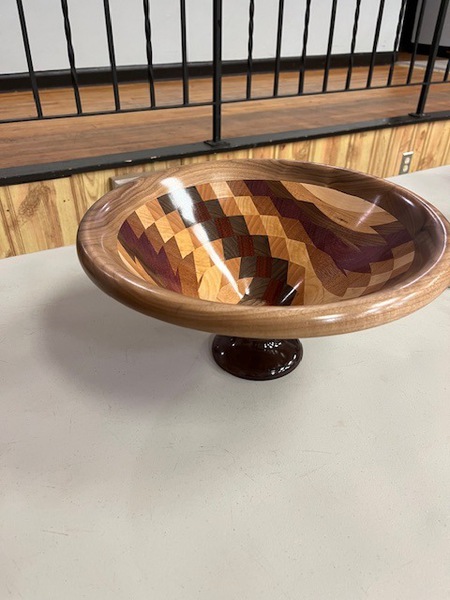
o Platters with fractal embellishment
o Pencil holder from split cedar fence rail
o Bowl from Lake Ontario driftwood embellished with epoxy and coffee grounds, finished with beeswax and mineral oil
o Small bowl burnished with shavings and finished with friction polish.
o Natural edge bowl with large foot
o Goblets
o Butternut bowls and acorn shaped box finished with beeswax and mineral oil.
o Small earring box with ring holder finial on the lid
o Lidded boxes
o Spalted maple burl bowl filled / strengthened with PolyAll 2000
o Silver maple platter with central bowl
· Challenge for January will be to do a sphere (solid or hollow) using the cupchuck method that Keith demonstrated.
End of Notes
Notes by Dave Lindensmith
November 8 2017; Christmas Ornaments
Notes of KWT Club Meeting of November 8, 2017 held at Frontenac High School.
Discussion:
· Nelson called the meeting to order at 1905 and welcomed new members.
· Quinte Woodturning Guild will be having a pop-up store November 23-26, 2017. KWT members are invited to submit items for sale. Talk to Nelson if interested and he will provide contact information for Barry Robertson of the QWG, who is organizing the event. 35% of the value of each item sold will be donated to the United Way.
· The Exhibition “Artistry in Wood 2018” was discussed. This will proceeding as a solo initiative of the KWA. The next event is scheduled to occur in 2019 (not 2018) and will be open to all who work in wood (not just KWA members). It is KWA’s vision that this will be a juried gallery event.
· Elections were discussed. Members were urged to consider serving on the Executive. Nominations will be held at the December meeting with elections to be held in January 2018. Members serving on the Executive are required to become members of AAW and, as a result, the Club will pay the AAW dues of the Executive.
· The CFB Kingston Craft Fair will be held November 18-19 from 10 am to 5 pm each day. Set up will be Friday November 17 from 5 pm to 6 pm. A roster sheet for booth coverage was circulated at the meeting by Jim Dedrick. Jim to e-mail those volunteering so that no one forgets their time slots. Thanks to all who volunteered. Members can drop off items for sale on Friday, November 17 between 1700 and 1800 during set up. Please make sure items are marked with your name and the selling price. As always, 25% of the sale price goes to KWT.
· Nelson noted that the MacLachlan Woodworking Museum (MWM) would be flipping the museum room and workshop room to create a new workshop space. The new space could be used for community demonstrations among other uses. Nelson circulated a sheet during the meeting to obtain ideas as to how this space could be used by KWT and what equipment would need to be available.
· Ron Oastler noted that anyone wishing to display items in the showcases at Lee Valley Tools should talk to him. He has permission forms and will take items to and from LVT.
· Lance Besharah has donated an air cleaner to the club to be raffled. A total of 40 tickets will be sold at $10 each. The draw will be held once all tickets are sold.
· Ken Waller noted that there is also a 1 day show at Rideau Acres (north of Hwy 401) on Saturday, November 18th.
· KWT participation in MWM Winterlight was discussed. KWT will be at the event and intends to make small (production type) Christmas ornaments available.
· The KWT facebook page was discussed with a view to making it less static.
· A demo of turning Christmas Ornaments as a production item (eg bells, angels, snowmen, finials-icicles, Christmas trees, birds houses) was held. Since the demos were short in duration, members had the opportunity try turning these items. Three stations were set up and ran concurrently:
o Finials and Icicles - Nelson Freedman
o Birdhouses - John Williams
o Snowmen and Angels - Joe Bernard
· Items brought in for show and tell and Challenge included:
o Small bowl / platter embellished with iridescent paint
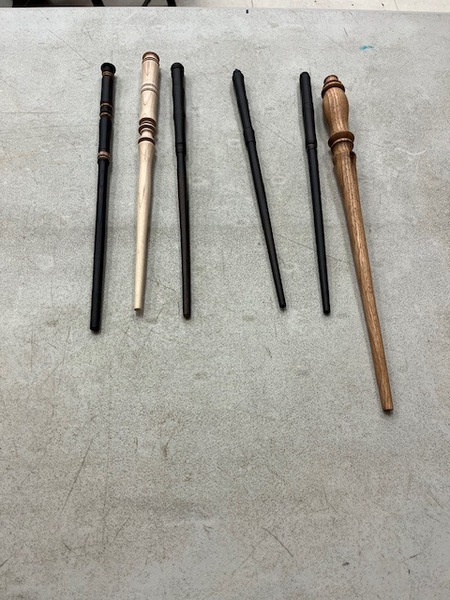
o Two piece wands (laminated) with texturing (turning reveals the various woods)
o A series of ash bowls with various embellishments (carving/stippling, burning and texturing and carved)
o Box Elder (Manitoba Maple) bowl with worm holes filled with coffee grounds
o Vases with carved embellishment
o Vase with teardrop shaped piercings
o Black walnut bowl with cared holes in the rim
o Goncalo Alves bowl
o Faceplate claw chuck for gripping irregularly shaped surfaces (each sharpened screw claw can be set to a different depth)
o Pen with stand
o Maple plate
o Flat rimmed spalted bowl
o Spalted bowl embellished with coffee grounds
Challenge for December meeting will be to do production type Christmas ornament(s
The monthly meeting was rescheduled to the first Wednesday of the month, October 4th to accommodate the visit of Neil Turner from Australia.
Neil talked about embellishments to improve our pieces. More information can be found on the internet under Neil Turner. Copy and paste the website below to go directly to his site.
www.neilturnerartisan.com.au/
June 14 2017 Keith Notley : Twice turned bowls
Twice-Turned Bowl Turning 14.Jun.17
FIRST TURNING
1. Cut log slightly longer than its maximum diameter. NOTE: The sooner you start on the
first turning after the tree is cut, the better.
2. Cut log in half lengthwise, having regard to the symmetry of each half and the position of
any knots or other significant features.
3. Trim half log to circular shape using band saw if possible or chain saw if too big.
4. Mount blank to lathe between centres, flat side at head end. Check for reasonably true
running and adjust if necessary before final tightening of tailstock. For larger blanks you
may consider using a screw chuck or faceplate.
5. Turn outside of bowl. Cut tenon or recess to reverse mount in 4-jaw chuck. (Generally
prefer recess with larger diameters.)
6. Reverse blank and mount in chuck by tenon or recess. (Make sure centre of base is
marked for later reference.)
7. Turn inside of bowl to wall thickness about 10% of max diameter. Try to keep wall
thickness fairly uniform to prevent stresses from uneven drying. Don’t worry about
achieving a nice finish. For large sizes and/or premium wood, coring can be done to
create more bowls and save on shavings production.
8. Coat outside of rough-turned bowls with anchorseal, or boil, cool and bag. Leave to dry
for appropriate time. (1 year/inch of thickness.)
SECOND TURNING
1. Select dried rough-turned bowl from First Turning or Coring. If cored, you may need to
estimate the centre point on the base. Make dimple with bradawl. NOTE: It is useful to
measure the thickness at the centre of the base before mounting on the lathe.
Expand 4 jaw chuck to maximum. Hold inside of bowl over chuck jaws while bringing
up the tailstock live centre to engage the centre point. (Penetration of the live centre can
be limited by means of a washer or nut placed over the point.) Ensure that all 4 jaws
contact the wood by adjusting the contact points and tightening the tailstock as necessary.
2. As the rough-turned bowl dries, it becomes oval in shape. This is the reason why we
leave a fairly thick wall in the first turning so that we can turn away the outside on the
long axis and the inside on the short axis and still end up with a circular bowl. The
uneven shape will cause a lot of vibration when rotating. The larger the bowl, the more
troublesome this vibration will be. True up the rim first, and then turn outside of bowl to
finished shape. Use shear scrape technique to get as fine a finish as possible to minimize
sanding time. Do not sand the outside yet. If stub left from coring is too small, turn it
away and cut new tenon to suit chuck. (This is where it is useful to know the thickness of
the base – how much wood you have to work with.)
3. Reverse the blank and hold in the chuck by means of the tenon or recess.
4. Turn the inside. After removing the excess out-of-balance material from the inside, you
may be able to take another light cut on the outside to reduce vibration still more. Now
that the bowl is round you can increase the speed and continue hollowing the inside of the
bowl to the desired thickness. The conventional method of cutting using the bowl gouge
starts at the rim and proceeds towards the centre, riding the bevel and with the flute
towards the centre so that the cutting edge to the left of the tip does the cutting. With dry
wood you will find that you cannot take as large a shaving as you can with green wood in
the first turning. Take light cuts when approaching final thickness and try to minimize
chatter and tearout. Ideally, the final cut should be made with a single continuous sweep
with the bowl gouge. Don’t despair if you have difficulty with this at first. A round-nose
scraper can be used to get an excellent finish on the bottom third of the inside of the
bowl. This also solves the problem of riding the bevel all the way to the bottom. Turn the
lathe off and run your fingers across the bottom of the bowl to check for ridges. Use a
pencil to mark high spots and remove them with the scraper. Fingers are also the best
way to check for consistent wall thickness in small bowls. For larger bowls you will
need callipers. Don’t try to check wall thickness while the lathe is running. The bowl
rim is like a circular saw!
4a. As bowl size increases and wall thickness decreases, it becomes increasingly difficult to
achieve a good finish cut on the inside, as the tendency to flutter increases. There are two
spots on opposite sides of the bowl where it is difficult to control grain tearout. (You will
soon discover where these are!) I have developed two techniques to help solve this
problem: - The first is to use a pull cut with the flute facing towards you and cutting with
the left side of the flute. Once you have found the appropriate angle of presentation of
the gouge to the wood, try to maintain that geometry as the cut progresses from centre to
rim. The second way to control flutter is by using a bowl steady. I have found that the
commercially available types using wheels riding on the outside of the bowl create more
problems than they solve. The method I advocate involves mounting a disc of wood on
the live centre of the tailstock and running it in to bear against the inside of the bowl.
You can then use the pull-cut technique from the disc contact to the rim. With large
diameter bowls, a number of progressively smaller discs can be used and the finishing
cuts done in stages and blended appropriately.
5. When you have done the best you can with the tools, sand the inside. If your lathe is
reversible, you will find it beneficial to sand in both directions. Resist the urge to sand
the outside at this time. Wetting the wood occasionally will raise the grain and allow you
to achieve a better finish. There are always two spots on opposite sides of the inside of a
bowl where it is almost impossible to avoid some degree of tearout. Some dedicated
hand sanding with 80 grit on these spots may help to reduce the total sanding effort.
N.B. When sanding, be sure to clean the sanding dust away between each change of grit.
A vacuum or compressed air blower is handy for this. Pay particular attention to any
knots or bark inclusions which may have small pits where grit particles can lodge, to be
released later when you have progressed to finer grits.
6. When satisfied with the sanding job, you can apply the finish to the inside of the bowl if
it is one of the finishes that can be applied and buffed immediately. (Shellawax or
Clapham’s Salad Bowl Finish.) For other finishes that require time to cure, leave the
application of finish till later.
7. Remove from lathe. Measure thickness at centre of base with callipers before
remounting. Use a cushioning block in the chuck, and a pad to protect the finished inside
of the bowl before placing bowl over the chuck. Bring up the tailstock to the centre of
the base and snug up tailstock.
8. Finish turn the base to as close as you can get to the tailstock centre. Use the thickness
measured in 15 above and the height of the stub at the centre to determine how deep to
make the recess in the base. Turn a foot if the design calls for it or blend in the bowl
outside curve all the way to the bottom. Make any finishing touches to the outside
surface with the side of the bowl gouge used in the shear scraping mode.
9. Sand the outside of the bowl and the accessible part of the base. (Use a flat sanding
block with the coarser grits to maintain a flat plane surface on the foot. When sanding
with a block, keep it moving to avoid burning the paper.)
10. Apply finish if it was done on the inside.
11. Remove from lathe, sand off stub, sign and finish base.
Keith R. Notley
14.Jun.17
May 10 2017 Malcolm Zander demo
Notes of KWT Club Meeting of May 10, 2017 held at Frontenac High School.
· Nelson called the meeting to order at 1855.
· Herb discussed the Joint KWT-KWA symposium to be held at the Communications Museum of June 10.
o Objectives of the Gallery is to show the public the work KWA and KWT members do and to raise the profile of our respective clubs
o Show to be called “Artistry in Wood 2017”
o Registration for the event is free to KWT members but the organizers need to know you’re coming. Therefore, there will be a registration. Registration forms were available at the meeting. The registration form will also be posted on the KWT Website.
o A brief description of items should be included with the registration. The “item size” part of the form is not really applicable to KWT. It is geared toward KWA, some of whom could be bringing in large furniture items.
o Entry of items will be open to KWT and KWA members (only) and items will not be screened / juried.
o Members were strongly encouraged to submit at least one item. Organizers are looking for a broad spectrum of work from turners of all experience levels.
o If you are unable to attend, please leave a piece or 2 with someone to take on your behalf
o Tables are 6 ft in length.
o The room is available for set-up from 1300 – 1600 on Friday
o Small posters are available. Please take 1 or 2 to post in local businesses
o There will not be an entry fee to members to display / sell items or a club commission on sold items.
o Sale of items will strictly between exhibitor and buyer
o In order to encourage attendance, entry will be free to the public
o Exhibitors must bring their own extension cords if they need them
· Malcom Zander from the Ottawa Valley Woodturners made a presentation and demo of turning thin walled pierced vases. See also Malcolm’s handout (available on KWT website at http://kingstonwoodturners.com/meeting-notes-2017/).
o No sophisticated tools are required.
o A 60o bowl gouge is used for 95% of the time, with a 45o bowl gouge also used
o Endgrain and cross-grain examples were presented
o Why thin-walled?
§ Create a form with lightness and delicacy
§ If the item is pierced, a thicker wall “closes off” the holes when viewed from obligue angles.
o Why use dry wood?
§ Dry wood moves much less during turning
§ Gives more time to the turner to cut the thin wall without the piece becoming oval during turning
§ The piece can be sanded to its final finish on the lathe
o Why use cross-grain blanks?
§ No special tools are required, just bowl gouges
o Malcolm’s current work evolved from starting with natural edge bowls with sapwood rims
o Most lace is based on a hexagon shape
o The “Heart” bowls are turned end grain
o One idea can lead to a whole series. For example, the natural edge with leaf motif
o For a natural edge piece, the high wings must be the same height. It is aesthetically ok if the low wings (ie front and back of bowl) are of different heights.
o Use the tailstock for support for as long as possible
o The cone center can be effectively used during hollowing
o Once the wall thickness is about ⅜” thick, switch to the longer bevel (45o) bowl gouge
o To create an even, thin wall sight along the profile using both eyes.
o Calipers can also be used. Set the calipers so there is a gap at the desired thickness. As you progress down the bowl if the gap lessens, the wall is too thick.
o When entering a cut near the edge, use your left thumb as a steady/fulcrum to prevent the gouge from “skating” toward the rim
o Work in 1” increments so that the piece does not become prone to flexing during turning
o Once you are done a section, you can’t go back.
o When hollowing, set the tool rest to be parallel to the profile.
o The bowl in the presentation was approximately 12” diameter with 1 mm wall thickness and sanded to 2000.
o Piercing can be done with a dental drill or an NSK unit.
o Both turn at approximately 400 000 rpm.
o The NSK is a “pen” configuration, while the dentist’s drill is a right-angle configuration
o The NSK has enough torque to handle a wall thickness of ⅛”.
o A dental drill can go up to about 1.5 mm (1/16”)
o A 40 000 rpm unit, such as Foredom, tends to track the grain
o Cut with the bit perpendicular to the surface of the piece
o Use one finger as a fulcrum for steadiness.
o File the holes with a diamond file to smooth them and to get rid of burn marks.
o Prior to filing, most of the burn marks can be removed by “wiping” the cut surface with the edge of the NGK (or dentist’s drill).
o The Rollie Munro “Holy Rollie” hollowing tool was demonstrated and discussed.
o Good light is essential for thin walled vessels and for piercing
· Several items were presented at Challenge / Show and Tell including:
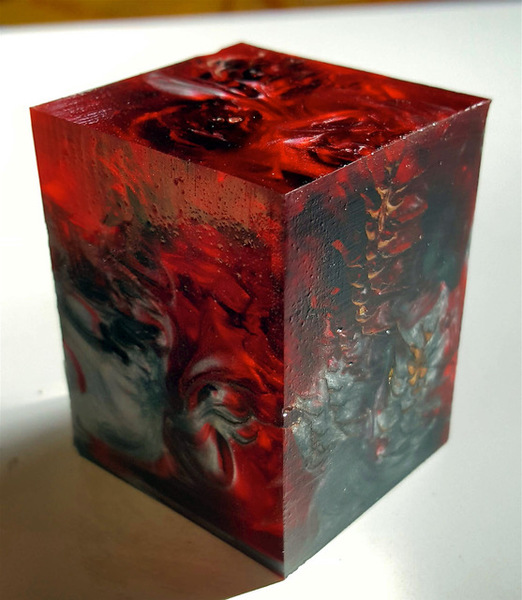
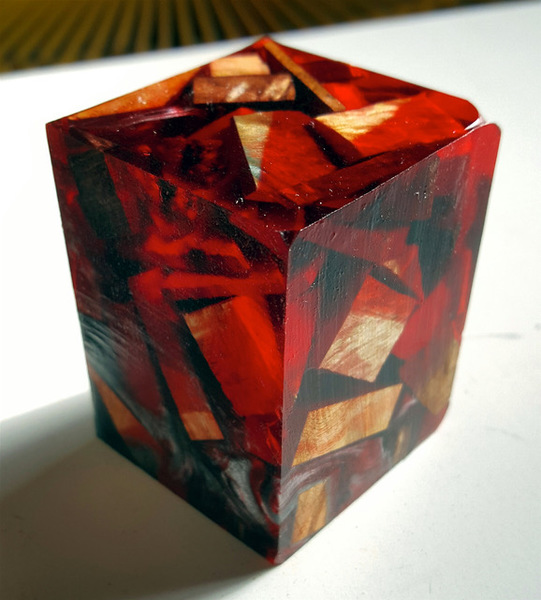
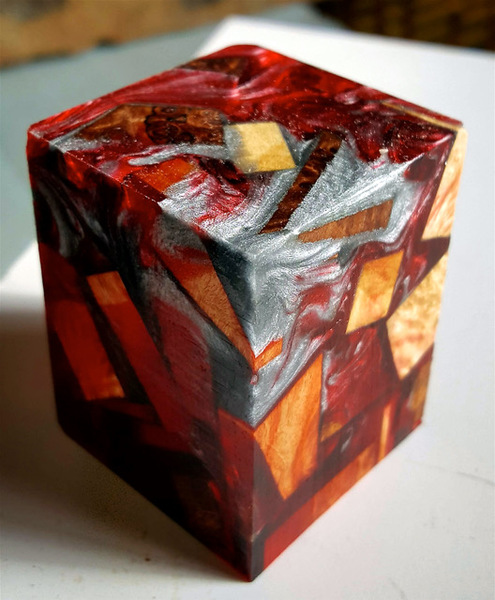
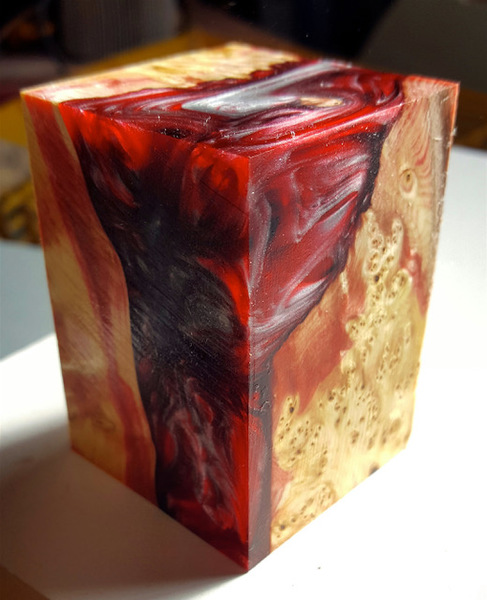
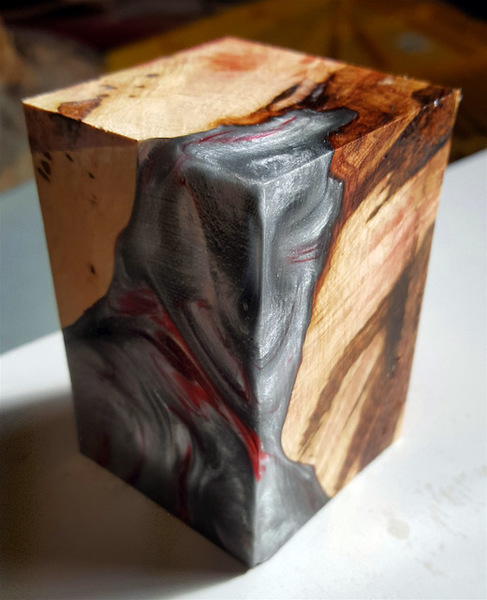
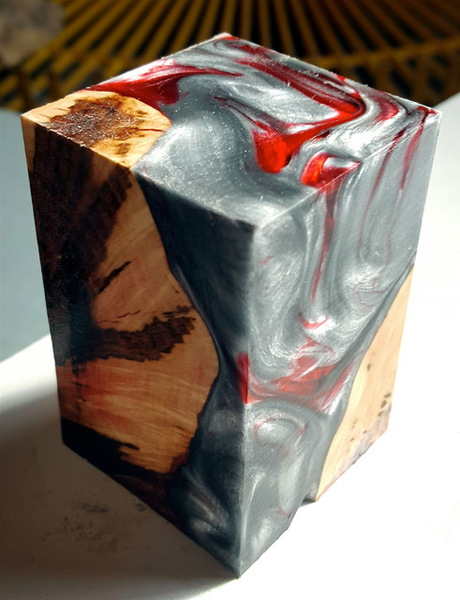
o Box incorporating alumilite resin
Malcom has provided us with a PDF hand out from the demo he did for us .
Febuary 8 2017
· Nelson called the meeting to order at 1900.
o Incorporating resin can make a holey piece of firewood into a very attractive blank.
o Resin is available from Woodchuckers and Leading Edge Hobbies.
o Although the resin is pricey, wine stoppers incorporating resin typically sell for $40 and Duck Calls $80 to $100.
o Molds are required and can be made from hardboard. Mold pieces are glued with medium CA glue.
o Since substantial heat will be generated, the mold material must be robust (no plastic yogurt containers)
o Molds are single use and are cut off when the casting has cured.
o After the mold is made, it is necessary to seal all the joints with CA glue as well.
o A shop built tray is used within the pressure pot to hold 2 levels of molds.
o Since wood will float, the wood is glue to the mold. Toothpicks can be glued to the bottom of the mold so the wood will sit on top and the resin will also cover the bottom face of the wood.
o Only bone dry wood should be used.
o Trevor dries his pieces in an old toaster oven set at 180o to 200o. The cycle is 2 hours on and ½ hour off.
o If not being used right away, the wood must be sealed immediately afterward so that the blank does not reabsorb moisture prior to use.
o Any soft material (eg bark) has to be removed from the wood using a pick, wire brush, or similar tool.
o Since the resin flow by gravity, the orientation of the blank (ie orientation of the cavities) within the mold is important.
o Wax and end sealer is the enemy of resin. Resin will not bond to a waxed surface
o For finishing, Trevor uses spray lacquer.
o Pieces are wet sanded to 400 to 600 grit.
o Several options for coloring are available, including:
§ Dyes (translucent)
§ Fluorescent dyes (opaque)
§ Mica Powder (sold for use in making home cosmetics. Mica powder does not absorb into the wood)
§ Oil base paints (though these are opaque and will also result in the resin not fully hardening)
o Once the wood is added to the mold, screen fabric is glued to the top edge of the mold so the wood does not float away.
o The alumilite is mixed and poured through the screen. A smallhole can be placed in the screen to allow the alumilite to get through faster.
o The aluminlite is mixed by weight, not volume.
o The open time is approximately 15 minutes. It is not necessary to hurry, but it is important to be well organized and have all materials etc ready to go.
o The alumilite was mixed in plastic cups. A mixing attachment on a cordless drill was used to ensure the product was well mixed, which is critical.
o A red dye and silver mica pigment were selected for use in the demo. The resin mixture was divided into 2 cups, with Mica added to one and the dye to the other.
o There are no hard rules as to how much dye to used Beginners tend to use too much, resulting in a more opaque finished blank. Use of less dye will result in a more translucent look.
o Once poured, the castings were placed on the tray and put into the pressure pot.
o The pressure pot Trevor uses is rated at 65 psi. There is no reason to go above this.
o Although curing time is typically listed at 2 hours, it is better to leave the blanks under pressure overnight.
o Blanks can be turned 48 hours after removal from the pressure pot.
o Home-made parting tool
o Parabolic bowl gouge
o Christmas bell ornaments
o Potpourri bowl (red cedar finished with butcher’s block finish)
o A hollow shallow form
o Winged bowl (spalted maple)
o Vase (red cedar, finished with tung oil)
o Bowl (cherry)
o Bowl (burl)
o Surveying tray with integral bowl
o Hollow form (maple burl)
o Pens (Maple, Japanese Olive, Walnut and Redheart)
Adobe Acrobat document [46.3 KB]
Next meeting notes
TBA